|
|
|
|
|
|
|
|
|
 |
|
|
|
|
|
|
 |
|
|
|
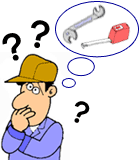
"There are a lot of measurement locations … Incidently, does not here remember whether to have measured it well a little while ago?"
"In the measurement here, will it be suitable to use which measurement machine and tool?"
while seeing the drawing?
It is an inspection navi to repulse such "Carelessness" under the inspection. |
|
|
|
|
 |
|
|
|
|
Inspection navi is...
|
|
 |
A measurement part is directed one by one on the screen of a PC.
The measurement method is plainly shown in the figure in the illustration.
|
|
 |
There is no necessity of almost touching a keyboard and it inspects easily.The registration of the inspection procedure is also possible only by the range specification and a numeric input and the item selection.
|
|
|
 |
Measurements of an electronic measuring instrument record as it is.
Record is used as a list as it is, and an output is possible for it, and it is saved a person trouble.
|
|
|
It is a software thet had the above feature.
|
|
|
|
| ▼It inspects easily by inspection navi. |
|
|
 |
|
|
|
|
 |
|
|
|
|
|
|
|
|
|
●It is easy to see legible, and it is a settled menu display and easy smoothness. It is possible to edit it by inputting the numerical value directly on the edit screen even when the allowance should edit it.
|
|
|
|
|
|
 |
|
|
 |
|
 |
|
|
|
|
|
|
|
|
|
|
|
|
●Inspection navi instructs the measuring method in a comprehensible illustration. The person with a shallow experience is supported as inspection personnel, and the uselessness at the inspection time is omitted.
|
|
|
|
|
 |
|
|
|
|
|
|
 |
|
 |
|
|
|
|
|
|
|
|
|
|
●In the inspection navigation, the part which should be inspected is automatically directed one by one by guidance. A measurement part leak can be prevented and smooth inspection work can be directed.When inspecting it, the part of the object is enclosed with a blue square, and it blinks, and the measurement part is understood at one view.
●The inspection navigation corresponds to various measuring instruments of electron (cable and electric wave remoteness input) type with an external output.
When measuring it, the necessity for feeling it keyboards is hardly, and can be inspected with an electronic measuring instrument in the hand.The necessity of parting with a measuring instrument for every measurement, and writing in a numericalis lost. Inspection and record can be performed simultaneously, without carrying out consciousness of "taking record."
|
|
|
|
 |
|
|
|
|
 |
|
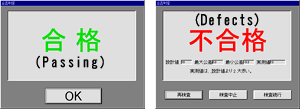
▲Success or failure screen after the inspection
|
|
|
|
●The pass or fail of measurements is judged at once. Those who measure it are adequately told pass or fail by using the voice. It is work of the inspection navigation that judges the allowance value taking it into consideration. A simple mistake that it makes a mistake in the allowance the calculation is prevented. Please input sentences that want to translate into here.
●When inspecting it in the inspection navigation, the display of failing is generated. However, if it is an inspection navigation, the processing matched to "Inspection discontinuance"stop the inspection, "The re-inspection", "Inspection continuation", and the situation is possible. Naturally, oneself can be adapted to the measurement part mistake and the measurement value mistake by the blurring etc.
|
|
|
|
|
 |
|
|
|
|
|
|
 |
|
▲Editing with Excel of the inspection result
|
|
|
●Even, because transform the measurement result in inspection navi into the file of the csv form and be possible the output the editing in the application for the general format editing is possible.
|
|
|
 |
|
| ▼ It data-manages by inspection navi. |
|
|

▲Inspection procedure registration screen |
- Instruction of inspection navi is hidden the display that the measure of the place that measures.Therefore, the misperception of measure that thinks and the measurement mistake that depends can be prevented to.
- The inspection result is possible to even the information of the inspection division/inspection person etc. is recorded automatically besides, the item (the name of product) and numerical value only and print with the form called inclusion "the inspection report card" even these information.
The trouble that posts the inspection result to the format, able to omit it and be useful for the construction of an advanced product control organization, besides it can prevent the mistake of when that I post.
| ※ It is possible to correspond to the demand item in ISO9000s as it is, because it is hypothesizing the correspondence to トレーサビリティ (the product pursuit ability) the etc. after the submission, guarantee of quality organization, product delivery of the inspection data that are expected as a/the client demand. |
- Inspection navi is having the value of a general common difference previously and call the common difference value automatically on the occasion of the inspection procedure/measured value registration.It' can also input the common difference that differs item by item the registration of the tolerance value other than a general tolerance nd each inspection.
Also, even to give a plural common difference table to inspection navi is possible with, I can also use appropriately the common difference table by the usage/delivery tip client.
- If it does the inspection with inspection navi the preservation of the data is automatic and be carried out.Making the record of the inspection result that continued namely.It is the function indispensable for the pursuit of the control and defective cause of a quality.
|
|
|
|
 |
|
|
| ▼ Cost reduction by using inspection navi. |
|
|
|
As you know the inspection profits and be not the work process which there is' that.
Defectiveness has occurred as it is continued, although it is said as the ideal that a perfect product is completed without doing the inspection, if it is basically. The inspection is inevitable such an article of inferior quality, as the mole that avoids reaching the holding of the customer.
Also, becoming to the inspection it the that skill is demanded. Probably an unfamiliar maintenance worker will be unable to raise the work achievement even half of the maintenance worker that got skilled.
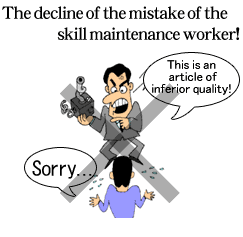
Furthermore, I am a human being even although it calls it with the inspector that got skilled. Without fail it does the mistake.The mistake of the maintenance worker assumed that it will rebound with, the form related to the profits that becomes visitor tip defectiveness and cause damage to the customer and said the decrease of order received quantity finally.
Inspection navi improves work efficiency by supporting an unfamiliar maintenance worker and be soft was developed to lose the mistake of the skill maintenance worker by instructing the inspection procedure.
By introducing inspection navi namely,
|
|

If it is inspection navi operation the machine takes the trouble to take out the easy top, the next work instructions even the unfamiliar maintenance worker is safe, because!
It is able to economize on the personnel expenses finally, because many inspections are able to do it more!
|
|

Because careless mistake by the skill maintenance worker is gone visitor tip defectiveness does not come out!
Expense of the correspondence/damage compensation to the customer.
|
| ↓↓↓ |
Finally "profit" and be connected to!
Inspection navi enables the cut of the expense,
by doing the support of the inspection! |
|
|
|
|
|
 |
|
|
|
|
|
|
 |
I do not understand the meaning even if I hear as necessary specification, because the personal computer is not detailed. |
Inspection navi is 'light' an application. Even the personal computer of before can use it sufficiently a little. Even with if it is examined the purchase of a new personal computer for inspection navi, so-called "a $1,000 of personal computer" it may be sufficient. However, OS as for a recent personal computer, please choose the one that OS is Windows98 (2nd Edition), because there is the thing of Windows2000. |
 |
As for inspection navi besides be absent the OS version? |
As of now, the development/sales of other OS version are not planned.
Probably I am considered to move regarding WindowsNT4.0 and Windows2000, however.
At present, WindowsNT4.0 and Windows2000 in acting it is during a check. |
 |
Is inspection navi able to spend it only to the product inspection of sheet metal processing? |
Seeing the drawing such as the preparation of the electron base and model to except for sheet metal processing, if I say from the conclusion the diversion is possible upon to the inspection.The knowledge (the Microsoft Access etc.) of the Windows application of some extent will become necessary however. or we are examining even that adds the editing function of inspection navi as the option. |
 |
Do make the data of 2 dimension computer aided designs, the drawing of inspection navi and be not able to use? |
|
The function that treats the various kinds format data including the dxf file as the image is not in inspection navi.Therefore, I am unable to divert the data of 2 dimension computer aided designs to inspection navi as it is.It is possible to use as the image of inspection navi, by preserve the image with the PrintScreen key and preserving with (※), gif or jpg format, if 2 dimension computer aided design software are for Windows however.
※The Copy key is used in the case of the body of the NEC98 series.
|
|
|
|
|
|
|
|
▼Specific of inspection navi
| Operating system |
Microsoft Windows95
Microsoft Windows98(2nd Edition) |
| Action environment |
CPU:Pentium (x86 compatible) the thing (recommendation 400MHz over) of 300MHz over.
Image definition 800×600 emission color number 65,535 color or more (recommendation 1024×768 HighColor or more).
Recommendation RAM 64MB over.
(The capacity for the use range, picture file of ※ OS are eliminated necessary HDD capacity 10MB.Recommendation be the vacancy capacity of 300MB over) |
| Others |
Scanner(When the drawing of paper is taken necessary.)
To edit image editing for soft(The image and transform into gif or jpg and preserve necessary)
Printer(When the format and the like of the inspection result are printed necessary.) |
| Special item |
It depends on the electron measuring device and the distant input of the measured value possibility (the point receiver) . |
|
|
|
【Matters that demand special attention】
■The introduction article is the thing under development.Screen layout etc. it is nonexistent notice specification are sometimes changed. Please acknowledge it.
■When you use the drawing on inspection navi the soft etc. for a special scanner and also image editing become necessary.
■Even simultaneous sales is informed, although the various kinds electron measuring devices are different sale. Please consult it readily.
■In the case that the measuring result is printed a special printer becomes necessary.
※Reproduction and that quote nonexistent the contents/images/articles on this homepage, permission are prohibited.
|
|
|
 |
|
|
|
|
 |
|
|
|
|
|
|
|
|
|
|
|
|
|
|
|
|
|
|
|
|
|
|
|
|
|
|
|
|
|
|
|
|
|
|
|
|
|
|
|
|

